

Claw Clip Hairstyles for Fine Hair: Expert Guide 2026
Delena MarklandYes, claw clip hairstyles for fine hair work beautifully when you choose clips with closer-set teeth and position them at the crown or mid-shaft rather than at the ends where fine hair loses tension. I've been helping clients with fine hair achieve polished, secure updos for over 25 years using the right clip selection and strategic placement techniques.
Fine hair presents unique challenges that I see daily in my chair. The strands themselves have a smaller diameter, which means less surface area for clips to grip. Many of my clients arrive frustrated after buying beautiful claw clips that simply slide out within an hour. The solution isn't avoiding claw clips altogether, it's understanding which styles and techniques actually work with fine hair's specific texture and weight distribution.
Understanding Fine Hair Texture and Clip Selection
Fine hair requires a fundamentally different approach to claw clip styling than medium or thick hair. The diameter of each strand matters more than you might think when it comes to accessory selection.
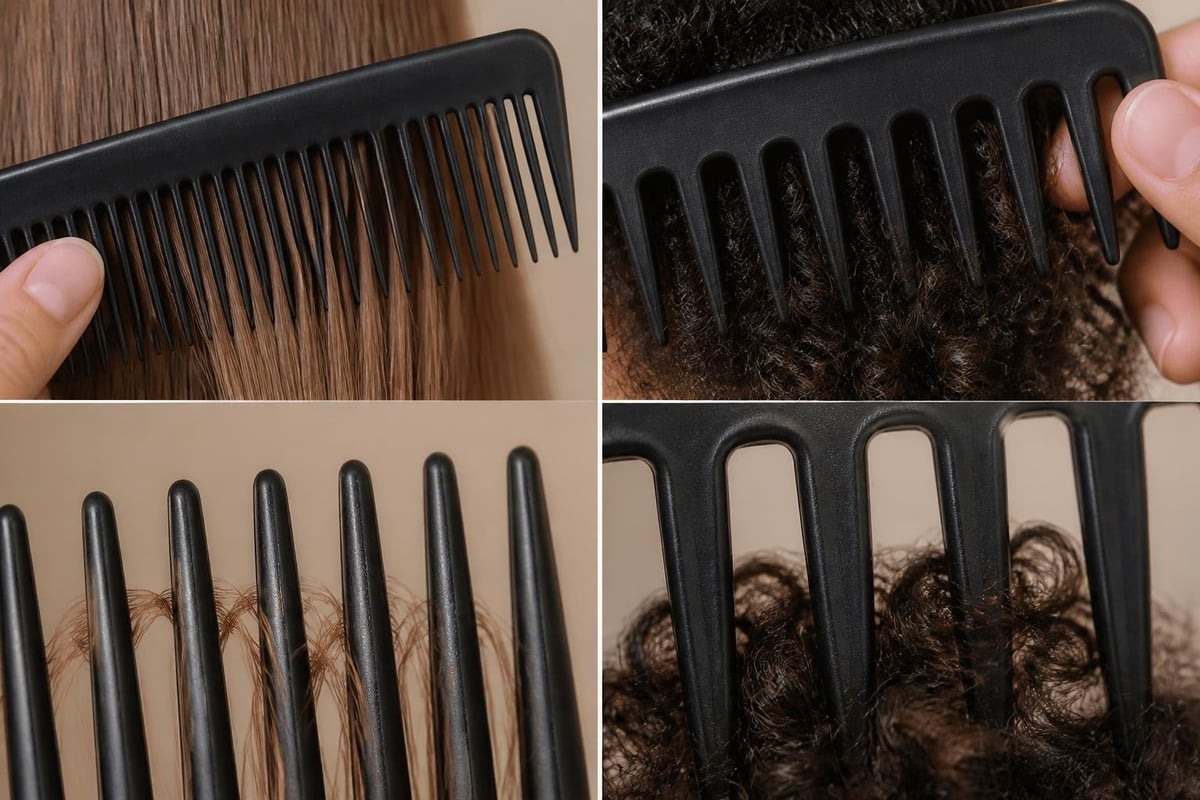
When I work with clients who have fine hair, I explain that clip tooth configuration is the single most important factor for hold. Wide-spaced teeth work well on thick hair but create gaps that fine strands slip through. Look for clips with teeth positioned no more than 2-3mm apart. This closer spacing creates multiple contact points that distribute pressure evenly without crushing the hair.
Spring tension is equally critical. Too strong, and the clip creates dents or breaks fragile strands. Too weak, and it won't hold the weight of gathered hair. I test clips by opening them halfway and feeling the resistance. For fine hair, you want moderate tension that requires deliberate pressure to open but doesn't snap shut aggressively.
Material Matters for Fine Hair Types
The material composition of your claw clip affects both hold and damage prevention.
| Material | Hold Rating | Damage Risk | Best For |
|---|---|---|---|
| Cellulose Acetate | Excellent | Low | Daily wear, all-day hold |
| Matte Plastic | Very Good | Very Low | Fine, fragile hair |
| Glossy Acrylic (quality, reinforced) | Very Good | Low | Daily wear, all-day hold |
| Metal Accent | Good | High | Avoid for fine hair |
Cellulose acetate provides the best combination of grip and gentleness. The slightly textured surface catches fine strands without snagging. Glossy materials create slippage, especially on freshly washed hair that lacks the natural oils providing friction.
Volume-Building Techniques for Claw Clip Hairstyles for Fine Hair
Creating the illusion of volume requires strategic placement and preparation. I teach every client with fine hair this fundamental principle: height at the crown transforms the entire silhouette.
Before securing any claw clip hairstyle, I prep the hair with texture. Day-two hair actually holds better than freshly shampoused strands because natural oils create grip. If you need to style on wash day, apply a volumizing powder or dry shampoo specifically at the roots where you'll position the clip.
The Crown Lift Method
This technique creates vertical volume that makes fine hair appear fuller immediately:
- Section hair from ear to ear across the crown
- Backcomb gently at the root (just 3-4 strokes)
- Smooth the top layer over the teased section
- Gather hair and position the claw clip at the base of the teased area
- Clip with teeth angled slightly upward to maintain lift
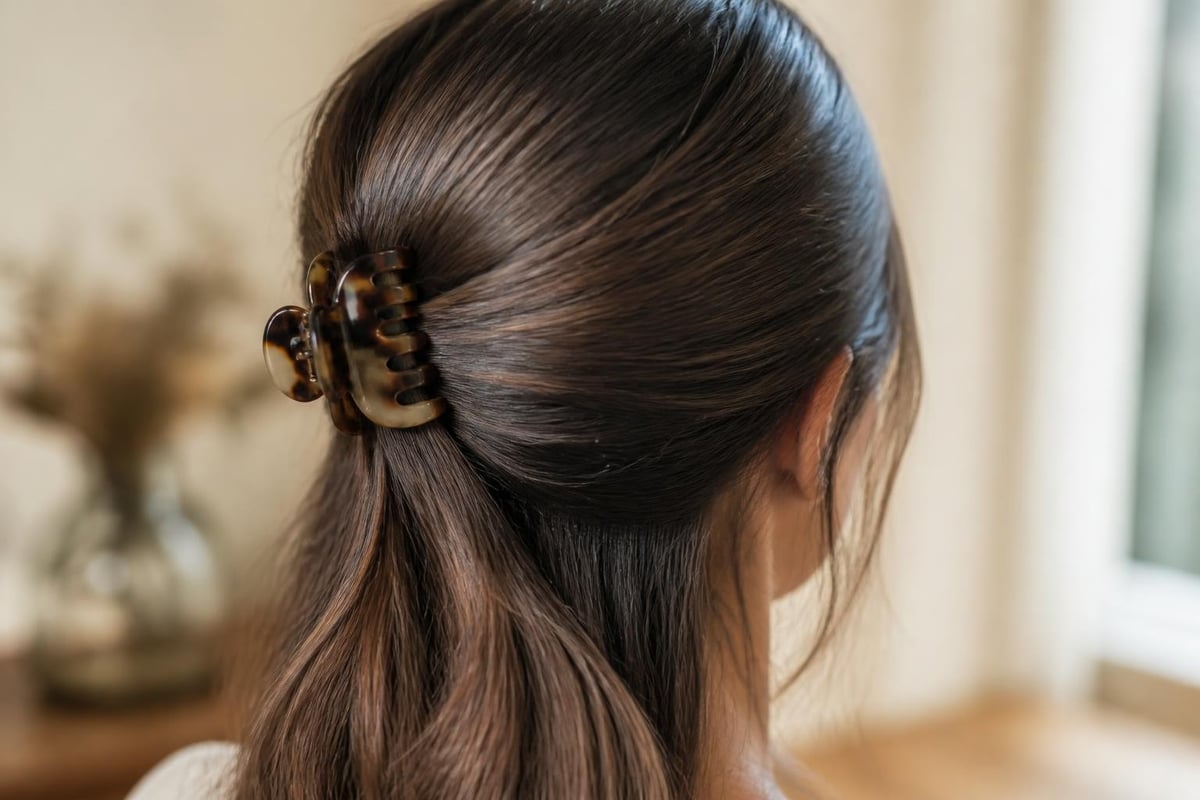
The angle of clip placement determines whether volume stays or collapses. Separate the two things people mix up here. The teeth enter angled slightly upward into the root, which is how they engage the hair. The clip body then sits 30 to 45 degrees downward from perpendicular, which is what stops it sliding out under the weight of your hair. Teeth up, body down. That combination creates space at the scalp without letting gravity work against the grip.
When working with salon styling essentials, I always recommend starting with products that build foundation without weight.
Classic Half-Up Claw Clip Styles
The half-up configuration is the most forgiving claw clip hairstyle for fine hair. It works with various hair lengths and face shapes while maintaining security throughout the day.
I position half-up clips at the occipital bone, that slight bump at the back of your head where your skull curves. This natural anchor point provides structural support that prevents sliding. Gather hair from temple to temple, twist once to consolidate the section, then secure with the clip horizontal to the floor.
For clients wanting more sophisticated variations, I create a modified French twist half-up. The technique involves gathering the top section, twisting it two full rotations, then folding the twist back on itself before clipping. This creates a rolled effect that looks polished enough for professional settings.
The clip you reach for decides whether that folded twist survives the afternoon. On fine hair I go longer rather than chunkier, which is why I keep the longer butterfly-shaped clip in the gradient finish on my station for this exact style. At 5.3 inches it gives you a wide jaw span, so the small amount of hair a fine-haired client actually has gets spread across more teeth instead of being crushed into two or three. That means I can close it just far enough to hold the roll without cranking it tight, and there is no hard dent pressed into the strands when it comes out at the end of the day. It is also light, which matters more than people expect -- a heavy clip on fine hair slowly walks itself down the back of the head under its own weight until the whole twist lets go.
The classic half-up works particularly well when you need to manage fine hair that tends to fall forward into your face. Many of my clients use this as their daily style because it takes under two minutes once you master the hand position. The key is gathering firmly but not pulling so tight that you create tension headaches.
Adding Texture Before Clipping
Fine hair benefits from pre-styling texture that gives clips something to grip. I apply a small amount of texturizing spray to the section I'll be clipping, focusing on mid-lengths rather than roots. Let it sit for 30 seconds to activate before gathering the hair.
If you want the full breakdown of how clip size and jaw shape shift with hair type, I walk through it in my guide to using claw hair clips. Fine hair almost always needs a lighter clip than a general sizing chart suggests.
Low Bun and Chignon Variations
Low claw clip buns solve the problem of fine hair lacking the bulk needed for traditional bun techniques. Instead of wrapping hair around itself multiple times, you'll create a single fold that the clip secures.
Gather hair at the nape, twist it once, then fold the length back up toward the base. Position your clip horizontally across the fold to catch both the base and the folded section. This double-catch method provides the security that single-layer clipping cannot achieve with fine hair.
For chignon styles, I create a loose figure-eight with the gathered hair before clipping. This adds visual bulk without requiring actual volume. The crossover point where the figure-eight intersects becomes your clip placement zone.
Messy Bun and Casual Updo Options
The intentionally undone look actually works better with fine hair than perfectly polished styles. Fine hair's natural tendency to create wispy pieces becomes an asset rather than a problem.
To create a messy bun that stays secure, I use the pineapple gathering method. Flip your head upside down, gather all hair at the crown as if creating a high ponytail, then stand upright. This gathering technique automatically creates lift at the roots. Twist the gathered hair loosely twice, wrap it around the base in whatever direction feels natural, and secure with a large claw clip positioned vertically through the center of the bun.
The vertical clip placement is critical for messy buns on fine hair. Horizontal clips create pressure that can cause the bun to list to one side. Vertical placement distributes weight evenly and allows the bun to settle into its natural shape.
Incorporating Face-Framing Pieces
I always pull out a few fine pieces around the face before securing the clip. This serves two purposes: it softens the overall look and reduces tension on the hairline where fine hair is most fragile.
Use your index finger to pull out sections roughly 1/4 inch wide at each temple and in front of each ear. These pieces should be pulled gently, not yanked. The goal is barely visible wisps, not chunky face-framing sections that look like you forgot to include them in your updo.
After clipping, those face-framing pieces benefit from a light hold product. Many of my clients struggle with baby hairs and flyaways around their hairline that disrupt the polished aspect of their style. A targeted finishing product smooths these areas without weighing down the overall style.
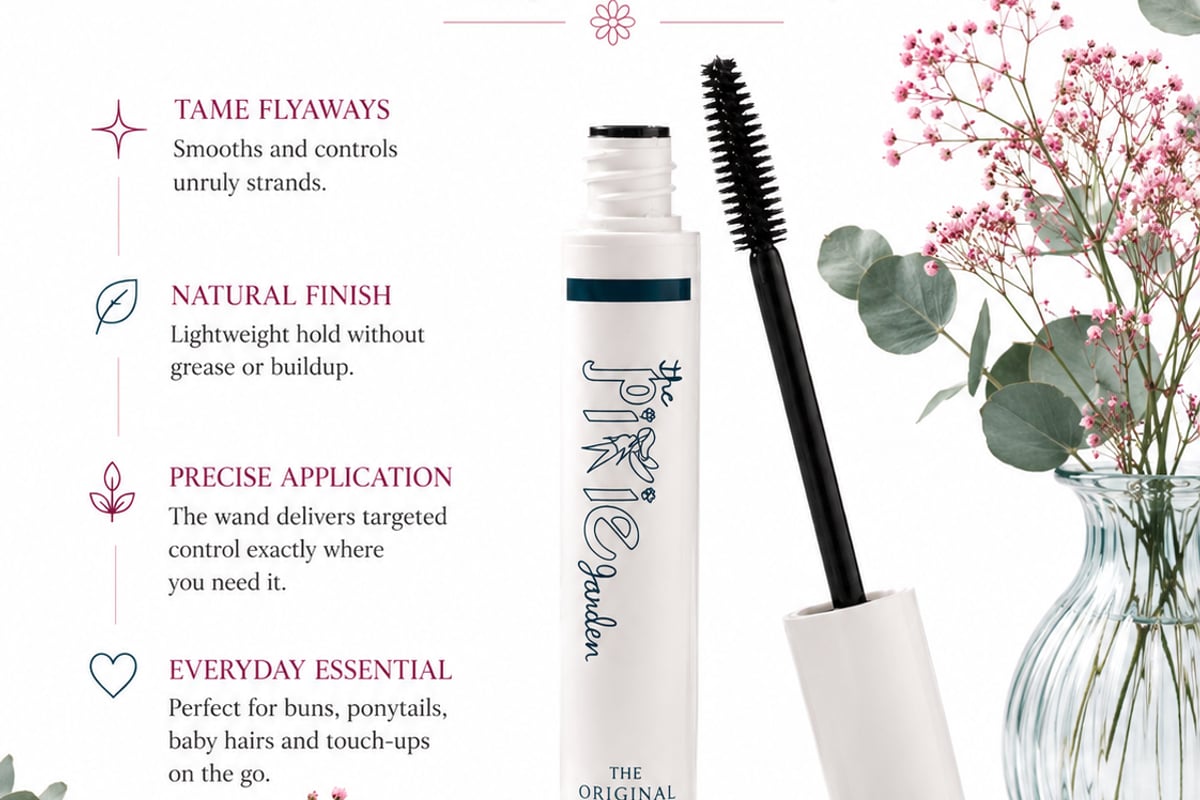
The Hair Finishing Stick has become my go-to recommendation because the precision wand targets exactly those small areas without transferring product to the main style. The water-based formula means no stiffness or residue that can make fine hair look separated or crunchy.
Clip Size and Hair Length Compatibility
Matching clip size to hair length and density prevents the most common styling failures I see. Density decides how far the jaw has to close, and length decides how much clip you need to carry the section, so size follows length rather than density alone. On short or shoulder-length fine hair a clip that's too large overwhelms it and slides out under its own weight. On long fine hair a clip that's too small can't gather enough hair to create a secure hold.
For shoulder-length fine hair: Use medium clips (3-3.5 inches)
For mid-back length fine hair: Graduate to large clips (4 to 5.3 inches), kept lightweight and wide in the jaw span
For very short fine hair (chin-length): Mini clips (2-2.5 inches) for half-up styles only
I test the size match by gathering the hair section you want to style and measuring the gathered diameter. Your clip should be able to close with about 30% of its capacity unused. If the clip closes with maximum tension just to capture all the hair, it's too small and will fail under normal movement throughout the day.
The claw-clip chignon is the shape I see most often on fine hair right now, and it adapts well as long as you size down rather than up. A wide, light jaw span holds the fold without crushing it flat.
Preventing Clip Slippage Throughout the Day
Slippage is the primary complaint I hear from clients with fine hair who've tried claw clips and given up. The solution involves both product preparation and mechanical technique.
First, assess your hair's natural texture. If it's very straight and silky, it needs more friction assistance than hair with natural wave. Apply a light texturizing spray or volumizing powder specifically where the clip will sit. This creates microscopic texture that gives clip teeth something to catch.
The three-point grip technique prevents slippage:
- Open the clip fully and position it at your desired location
- Close it one-third of the way to capture the bottom layer
- Adjust the angle to ensure even distribution
- Close it completely while maintaining that angle
Many people rush the closing action, which causes uneven pressure distribution. The clip should close in a controlled manner over about 2 seconds, not snap shut.
Adjusting Clips Without Starting Over
When you feel a clip loosening during the day, you don't need to remove it and restart. I teach the refresh technique: use one hand to support the base of the style while opening the clip slightly with the other hand. Gather any loose pieces, then re-close the clip at a slightly different angle. This redistributes pressure points and often adds another several hours of hold.
Once you know which configurations your hair can actually hold, picking a style gets much easier. I run through the ones I use on clients in my claw clip guide, sorted by skill level rather than by trend.
Styling Fine Hair for Maximum Clip Hold
Preparation determines success more than the actual clipping technique. I start every claw clip styling session by assessing hair condition and cleanliness level.
Day-two or day-three hair holds clips better than freshly washed hair. The natural oils create friction without making hair look greasy. If you must style on wash day, apply a volumizing mousse to damp hair, focusing on roots, then blow-dry with your head inverted to create maximum lift.
Temperature styling before clipping serves a dual purpose: it adds texture and creates temporary bonds that help hair maintain its gathered shape. I run a curling iron or wand through mid-lengths on a medium setting, creating loose bends rather than defined curls. These bends increase the hair's surface area and create points where individual strands catch against each other within the clip.
| Preparation Step | Fine Hair Benefit | Timing |
|---|---|---|
| Texturizing spray | Adds grip | 1-2 minutes before clipping |
| Root volumizer | Creates lift | Apply to damp hair, blow-dry |
| Loose waves | Increases surface area | 5-10 minutes before styling |
| Dry shampoo | Absorbs oil, adds friction | Previous night or morning of |
The combination that works for most of my fine-haired clients involves dry shampoo applied the night before, loose waves created the morning of styling, and a light texturizing spray right before clipping.
Professional Finishing Techniques
The difference between a home-styled look and a salon-finished appearance often comes down to the final two minutes of refinement. I never skip these steps, even for casual styles.
After securing the clip, I examine the style from all angles using a three-way mirror setup. Look for sections that appear too tight or too loose. Use a tail comb to gently pull at the crown area, creating controlled volume that looks intentional rather than accidental. This "pancaking" technique, borrowed from braiding, makes fine hair appear two to three times fuller.
Flyaway control is the final touch. Rather than spraying hairspray over the entire style, which can create stiffness, I target specific areas. Spray a small amount of flexible-hold spray onto a clean toothbrush and gently brush over any frizzy sections. This provides control without the helmet effect that makes fine hair look weighed down.
The understated elegance of handmade hair accessories adds artisan detail to even the simplest claw clip styles, turning everyday looks into something special.
Advanced Claw Clip Combination Styles
Once you've mastered basic single-clip styles, combining multiple clips creates sophisticated looks that showcase fine hair beautifully. The key is using different sized clips for different purposes within one style.
I create a stacked clip look by securing a low ponytail with an elastic, then clipping the length up in a folded configuration with a large clip. I then add a small decorative clip near the face in a half-up position. This layered approach distributes weight across multiple secure points rather than stressing one clip to hold everything.
For clients wanting evening-appropriate styles, the twisted side-sweep with double clips creates asymmetrical elegance. Gather hair from one side of a deep side part, twist it diagonally across the back of the head, and secure at the opposite side with a medium clip positioned vertically. Then gather the remaining hair on the other side and secure with a small clip positioned horizontally just below the first. The contrasting angles create visual interest while the double securing system ensures all-night hold.
When a fine-haired client needs that same forgiving hold for a wedding or a holiday party, I swap the plain medium clip for the vintage filigree floral option. The openwork face sits high enough on the twist that it reads as jewellery from behind, so it stands in for a decorative comb without the metal weight that drags fine hair loose halfway through the reception. It is a selected occasion piece and we only keep four on hand at a time, so plan around it rather than counting on it the week of the event.
You will see versions of these advanced techniques all over social media, but almost none of them are demonstrated on fine hair. Adapting them takes the tension and sizing adjustments I've described above.
Maintaining Claw Clips for Optimal Performance
Clip maintenance directly affects styling success, yet most people never clean their accessories. Hair products, natural oils, and environmental debris build up on clip teeth and hinges, reducing their gripping power and potentially damaging hair.
I clean my professional clip collection monthly using warm water and a gentle shampoo. Soak clips for 10 minutes, use an old toothbrush to scrub between teeth, rinse thoroughly, and air dry completely before storage. This removes buildup that causes slippage and prevents the sticky residue that can pull fine hair strands.
Storage matters too. Keep clips in a dedicated container where they won't get crushed or have their springs compressed. I store mine in a divided organizer that keeps different sizes separated. This prevents the spring mechanism from weakening over time, which is crucial for maintaining proper tension on fine hair.
Inspect clips regularly for damage. Cracked teeth, bent springs, or loose hinges all compromise hold and can break fine hair. Replace clips at the first sign of structural compromise. Quality clips from The Pixie Garden last significantly longer than mass-market alternatives when properly maintained.
Adapting Styles for Different Fine Hair Lengths
Fine hair at different lengths requires modified approaches to claw clip styling. What works for long fine hair often fails completely on short fine hair.
Short fine hair (chin to shoulder length) works best with mini clips and half-up styles only. Full updos don't have enough length to create secure folds. Focus on side clips that gather hair from temple to ear, or small clips that secure just the crown section while leaving length down.
Medium fine hair (shoulder to mid-back) offers the most versatility. You can execute half-up styles, low buns, and modified chignons successfully. This length provides enough hair to create folds and twists that clips can secure without requiring elastic bands for foundational support.
Long fine hair (mid-back and longer) paradoxically becomes harder to style with claw clips because the weight of the length pulls against the clip. I recommend twisting hair multiple times before clipping to consolidate weight into a denser section that's easier to secure. The twist also prevents the stringy appearance that very long fine hair can develop in updos.
For a side-by-side on which clip designs suit which length, my breakdown of the best claw clips for thin hair covers the same ground with low density in mind.
Seasonal Considerations for Claw Clip Hairstyles for Fine Hair
Environmental factors affect how fine hair behaves in claw clips throughout the year. Humidity, static, and temperature all require seasonal adjustments to maintain hold.
Summer humidity makes fine hair both limp and frizzy, a challenging combination. I increase the amount of texturizing product used before clipping and opt for slightly tighter styles that provide more security. The moisture in the air reduces friction, so clips need mechanical help through firmer gathering and strategic product placement.
Winter brings static electricity that makes fine hair flyaway and difficult to control. Before clipping in winter months, I run a small amount of lightweight oil through mid-lengths to combat static without creating grease. The oil conducts away static charge and adds just enough weight to keep hair manageable. After clipping, a light mist of anti-static spray prevents the halo effect around the style.
Understanding how seasonal hair challenges affect styling success helps you adjust your technique throughout the year rather than abandoning styles that worked perfectly just months earlier.
Troubleshooting Common Fine Hair Challenges
Even with proper technique, certain challenges arise consistently with fine hair and claw clips. I've developed specific solutions for each.
Problem: Clip slides out within an hour
Solution: You're either using a clip with teeth spaced too far apart, or your hair is too clean. Add texture with dry shampoo, use a clip with closer tooth spacing, and check your angle: the teeth should enter slightly upward into the root, but the clip body should sit 30 to 45 degrees downward from perpendicular rather than straight back or tilted up.
Problem: Style looks flat and lifeless
Solution: Add backcombing at the crown before clipping, position the clip higher on the head, and pull the clipped section gently upward as you close the clip to build in elevation.
Problem: Hair develops dents from the clip
Solution: Your clip's spring tension is too strong for fine hair texture. Switch to a clip with moderate tension, or line the current clip's teeth with small pieces of velvet ribbon to cushion contact points.
Problem: Ends stick out awkwardly from the clip
Solution: This happens when you don't consolidate hair enough before clipping. Twist the gathered section 2-3 times before securing to create a denser bundle that tucks neatly into the clip.
Mastering claw clip hairstyles for fine hair transforms your daily styling routine from frustrating to effortless when you understand the specific techniques that work with your hair's natural characteristics. The right clip selection, strategic placement, and proper preparation create styles that hold securely while adding the volume fine hair naturally lacks. The Pixie Garden offers professionally curated accessories and styling products specifically selected to help you achieve polished, secure hairstyles that complement fine hair's unique beauty, making salon-quality results achievable at home.
FAQ: Common Questions About Claw Clip Hairstyles for Fine Hair
What size claw clip works best for fine hair?
Size to your length. Clips measuring 2 to 3.5 inches work best for fine hair at shoulder length or shorter, and from mid-back length down a lightweight large clip of 4 to 5.3 inches works better, because the wider jaw span spreads that small amount of hair across more teeth so one clip can carry the whole section. The clip should close with about 30% capacity remaining to ensure adequate spring tension without maximum stress. Mini clips of 2 to 2.5 inches stay reserved for short fine hair and half-up styles.
How do I stop my claw clip from sliding out of fine hair?
Choose clips with teeth spaced 2 to 3mm apart rather than wide-spaced teeth that fine hair slips through. Apply texturizing spray or dry shampoo before clipping to create friction. Angle the teeth slightly upward into the root and let the clip body settle 30 to 45 degrees downward, at natural anchor points like the occipital bone or crown area where skull structure provides support against sliding.
Can I wear claw clips in freshly washed fine hair?
Yes, but it requires additional preparation since clean fine hair is very slippery. Apply volumizing mousse to damp hair, blow-dry with head inverted for root lift, and use texturizing spray specifically where the clip will sit. Day-two hair holds clips more securely because natural oils provide friction without appearing greasy on fine textures.
What material claw clip grips fine hair best?
Cellulose acetate provides the best combination of grip and gentle hold for fine hair. Its slightly textured surface catches fine strands without snagging or causing damage. Avoid thin injection-moulded acrylic, which flexes and slips under load, but quality reinforced glossy acrylic is a genuine daily-wear material and grips fine hair well. Be cautious with metal accent clips that can be too heavy and harsh for fragile fine hair strands.
